Android中集成google play 登陆来获取用户名、邮件地址、token等用户信息
 最新推荐文章于 2024-05-15 19:59:20 发布
 阅读量3.8w
 收藏
2
收藏
2


 点赞数
2
点赞数
2

一、打开主界面:
https://developers.google.com/

二、点击最右侧的所有产品
https://developers.google.com/products/

三、点击登陆和身份识别,然后选择Google Sign-In

四、选择ANDROID

五、点击GET STARTED

六、点击ADD SIGN-IN TO YOUR APP

七、将谷歌登陆集成到Android应用
将谷歌登陆集成到你的Android应用
在你将谷歌登陆集成到你的app中之前,你必须在谷歌控API的控制台对该项目进行配置。接下来描述如何将谷歌登陆集成到你的app。
前期准备
-2.3或之上,并且包含Google Play Store的手机,或者Android4.2.2或者更高的Google APIS平台的系统并且有9.8.0或之上的谷歌服务。
-最新的Android SDK版本,包括SDK工具组件。可以通过Android Studio中的Android SDK Manager来进行下载。
-项目的编译版本在2.3或以上
-谷歌服务的SDK:
1.在Android Studio中,选择Tools>Android>SDK Manager
2.滑动到选项列表的底部,并选择Extras>Google Repository。软件包将会被下载到你的电脑,并且在SDK的配置目录下进行安装android-sdk-folder/extras/google/google_play_services
本文是推荐的开发工具Android Studio的开发指南
获取配置文件
点击下面的按钮来获取配置文件并添加到你的项目中。
配置文件为app提供了特殊的服务。在获取之前,你必须选择一个已经存在的项目或者重新创建一个。你还必须为你的app提供包名。
在创建配置文件的时候,你也必须提供签名证书的SHA-1.查看 Authenticating Your Client(https://developers.google.com/android/guides/client-auth) 获取更多的信息。
添加谷歌服务插件
Gradle的谷歌服务插件用来解析google-services.json中的配置信息。通过在project级的build.gradle中进行配置并且app级的build.gradle文件如下:
1.在project级的build.gradle中添加以下依赖:
classpath 'com.google.gms:google-services:3.0.0'

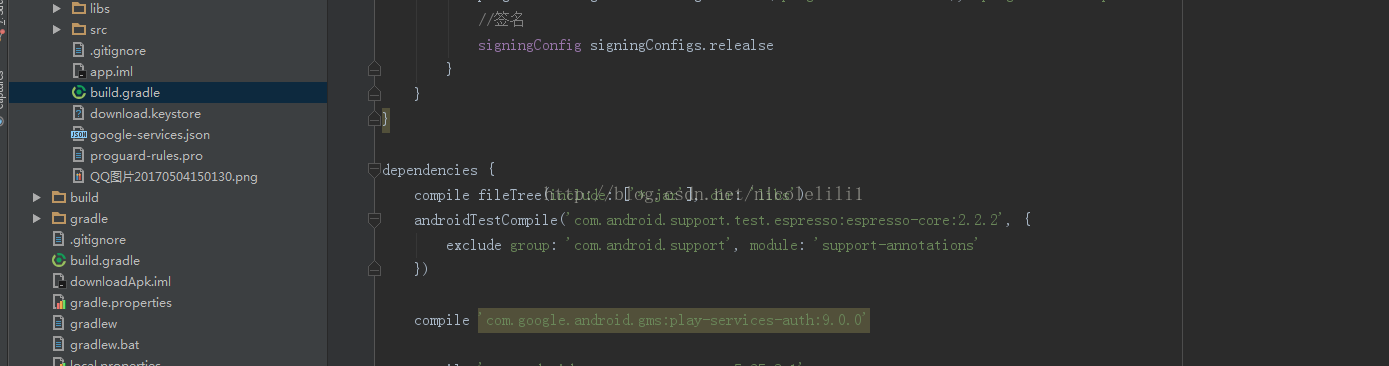
2.在app级的build.gradle中添加如下文件:
在app级的build.gradle文件中,声明Google Play Services的依赖:
apply plugin: 'com.android.application'
    ...

    dependencies {
        compile 'com.google.android.gms:play-services-auth:9.8.0'
    }
apply plugin: 'com.google.gms.google-services'
获取服务端的OAuth 2.0的客户端ID
1.打开凭证界面(https://console.developers.google.com/apis/credentials?project=test-analytics-f14b6)
2.网页应用类型的客户端ID是你的OAuth2.0客户端ID
注:如果你没有创建新的Android客户端,你可能没有网络应用类型的客户端ID.你可以在凭证界面点击创建凭证-->OAuth客户端ID来进行创建
当创建GoogleSignInOptions对象时,传入到方法requestIdToken或requestServerAuthCode.
配置谷歌登陆和谷歌客户端请求对象
1.在Activity的onCrete方法中,配置谷歌登陆所需的用户请求。例如,配置谷歌登陆请求的客户ID和基本的文件信息,创建一个默认参数的GoogleSignInOptions对象。用GoogleSignInOptions对象来配置用的邮件地址。
// Configure sign-in to request the user's ID, email address, and basic
// profile. ID and basic profile are included in DEFAULT_SIGN_IN.
GoogleSignInOptions gso = new GoogleSignInOptions.Builder(GoogleSignInOptions.DEFAULT_SIGN_IN)
        .requestEmail()
        .build();
注:为了使用enableAutoManage,必须继承Android Support Library下的FragmentActivity或者AppCompatActivity(FragmentActivity的子类)。你可以在Fragment中使用GgoogleApiClient;然而,该fragment的父Activity必须是FragmentActivity.如果你不能继承FragmentActivity,你必须手动管理GoogleApiClient连接的生命周期。
2.在Activityd onCreate方法中,创建要给GoogleApiClient对象来访问Google Sign-In AP和其它定义的信息。
// Build a GoogleApiClient with access to the Google Sign-In API and the
// options specified by gso.
mGoogleApiClient = new GoogleApiClient.Builder(this)
        .enableAutoManage(this /* FragmentActivity */, this /* OnConnectionFailedListener */)
        .addApi(Auth.GOOGLE_SIGN_IN_API, gso)
        .build();
注:为了自动化管理,activity必须继承Android Support Library包下的FragmentActivity或者AppCompatActivity(FragmentActivity的子类)。你也可以在Fragment中使用GoogleApiClient,然后,该fragment的父activity必须是FragmentActivity.如果不继承FragmentActivity,那么你必须手动管理GoogleApiClient连接的生命周期。
添加谷歌登陆按钮
1.在应用布局中添加登陆按钮
<com.google.android.gms.common.SignInButton
 android:id="@+id/sign_in_button"
 android:layout_width="wrap_content"
android:layout_height="wrap_content" />// Set the dimensions of the sign-in button.3.在Activity的onCreate方法中,注册当用户点击时登陆的按钮的点击事件:
SignInButton signInButton = (SignInButton) findViewById(R.id.sign_in_button);
signInButton.setSize(SignInButton.SIZE_STANDARD);
findViewById(R.id.sign_in_button).setOnClickListener(this);开始登陆
1.在Activity的onClick方法中,通过getSingnInIntent方法来创建一个登陆的intent来处理点击,并且通过startActivityForResult来开启intent
@Override
public void onClick(View v) {
    switch (v.getId()) {
        case R.id.sign_in_button:
            signIn();
            break;
        // ...
    }
}
private void signIn() {
Intent signInIntent = Auth.GoogleSignInApi.getSignInIntent(mGoogleApiClient);
startActivityForResult(signInIntent, RC_SIGN_IN);
}弹出提示框让用户选择一个所要登陆的账户。
2.在方法onActivityResult中从getSignInResultFromIntent中检索登陆的结果信息
@Override
public void onActivityResult(int requestCode, int resultCode, Intent data) {
    super.onActivityResult(requestCode, resultCode, data);

    // Result returned from launching the Intent from GoogleSignInApi.getSignInIntent(...);
    if (requestCode == RC_SIGN_IN) {
        GoogleSignInResult result = Auth.GoogleSignInApi.getSignInResultFromIntent(data);
        handleSignInResult(result);
    }
}
在获取到登陆的结果后,可以通过方法isSuccess来检测是否登陆成功。如果登陆成功,你可以调用方法getSignInAccount来获取登陆用户信息的GoogleSignInAccount对象,例如用户名。
private void handleSignInResult(GoogleSignInResult result) {
    Log.d(TAG, "handleSignInResult:" + result.isSuccess());
    if (result.isSuccess()) {
        // Signed in successfully, show authenticated UI.
        GoogleSignInAccount acct = result.getSignInAccount();
        mStatusTextView.setText(getString(R.string.signed_in_fmt, acct.getDisplayName()));
        updateUI(true);
    } else {
        // Signed out, show unauthenticated UI.
        updateUI(false);
    }
}package com.gp.download.apk;
import android.content.Context;
import android.content.Intent;
import android.os.Bundle;
import android.support.annotation.NonNull;
import android.support.v4.app.FragmentActivity;
import android.view.View;
import com.google.android.gms.auth.api.Auth;
import com.google.android.gms.auth.api.signin.GoogleSignInAccount;
import com.google.android.gms.auth.api.signin.GoogleSignInOptions;
import com.google.android.gms.auth.api.signin.GoogleSignInResult;
import com.google.android.gms.common.ConnectionResult;
import com.google.android.gms.common.api.GoogleApiClient;
import com.google.android.gms.common.SignInButton;
public class MainActivity extends FragmentActivity implements GoogleApiClient.OnConnectionFailedListener, View.OnClickListener {
private Context context;
private String dirPath;
private GoogleApiClient mGoogleApiClient;
private SignInButton SignInButton;
private int RC_SIGN_IN = 1;
@Override
protected void onCreate(Bundle savedInstanceState) {
super.onCreate(savedInstanceState);
setContentView(R.layout.activity_main);
context = getApplicationContext();
dirPath = context.getFilesDir().toString();
findViewById();
initData();
setOnClickListener();
}
private void setOnClickListener() {
SignInButton.setOnClickListener(this);
}
private void findViewById() {
SignInButton = (com.google.android.gms.common.SignInButton) findViewById(R.id.sign_in_button);
}
private void initData() {
// Configure sign-in to request the user's ID, email address, and basic
// profile. ID and basic profile are included in DEFAULT_SIGN_IN.
GoogleSignInOptions gso = new GoogleSignInOptions.Builder(GoogleSignInOptions.DEFAULT_SIGN_IN)
.requestEmail()
.build();
// Build a GoogleApiClient with access to the Google Sign-In API and the
// options specified by gso.
mGoogleApiClient = new GoogleApiClient.Builder(this)
.enableAutoManage(this /* FragmentActivity */
, this /* OnConnectionFailedListener */)
.addApi(Auth.GOOGLE_SIGN_IN_API, gso)
.build();
}
@Override
public void onConnectionFailed(@NonNull ConnectionResult connectionResult) {
}
@Override
public void onClick(View view) {
System.out.println("click 1....................");
switch (view.getId()) {
case R.id.sign_in_button:
System.out.println("click 2....................");
signIn();
break;
}
}
private void signIn() {
System.out.println("click 3....................");
Intent signInIntent = Auth.GoogleSignInApi.getSignInIntent(mGoogleApiClient);
startActivityForResult(signInIntent, RC_SIGN_IN);
}
@Override
public void onActivityResult(int requestCode, int resultCode, Intent data) {
super.onActivityResult(requestCode, resultCode, data);
System.out.println("click 4....................");
// Result returned from launching the Intent from GoogleSignInApi.getSignInIntent(...);
if (requestCode == RC_SIGN_IN) {
System.out.println("click 5....................");
GoogleSignInResult result = Auth.GoogleSignInApi.getSignInResultFromIntent(data);
handleSignInResult(result);
}
}
private void handleSignInResult(GoogleSignInResult result) {
System.out.println("handleSignInResult:" + result.isSuccess());
if (result.isSuccess()) {
// Signed in successfully, show authenticated UI.
GoogleSignInAccount acct = result.getSignInAccount();
// mStatusTextView.setText(getString(R.string.signed_in_fmt, acct.getDisplayName()));
// updateUI(true);
System.out.println("login succeed........................" + acct.getIdToken());
} else {
// Signed out, show unauthenticated UI.
// updateUI(false);
System.out.println("login failed........................");
}
}
}
<?xml version="1.0" encoding="utf-8"?>
<RelativeLayout xmlns:android="http://schemas.android.com/apk/res/android"
    xmlns:tools="http://schemas.android.com/tools"
    android:id="@+id/activity_main"
    android:layout_width="match_parent"
    android:layout_height="match_parent"
    android:paddingBottom="@dimen/activity_vertical_margin"
    android:paddingLeft="@dimen/activity_horizontal_margin"
    android:paddingRight="@dimen/activity_horizontal_margin"
    android:paddingTop="@dimen/activity_vertical_margin"
    tools:context="com.gp.download.apk.MainActivity">


    <com.google.android.gms.common.SignInButton
        android:id="@+id/sign_in_button"
        android:layout_width="wrap_content"
        android:layout_height="wrap_content" />

</RelativeLayout>
注:
1、出现异常:Failed to resolve: com.google.firebase:firebase-core:9.0.0

解决方法:
点击Tools>Android>SDK Manager>Launch Standalone SDK Manager,选择Google Play services 和Google Repository,并且点击install

2.在app级的build.gradle中添加apply plugin: 'com.google.gms.google-services'后报异常
Error:Execution failed for task ':app:processDebugGoogleServices'.
> File google-services.json is missing. The Google Services Plugin cannot function without it.
Searched Location:
E:\research\gp\downloadApk\app\src\debug\google-services.json
E:\research\gp\downloadApk\app\google-services.json

解决办法:打开网址https://developers.google.com/mobile/add?platform=android&cntapi=signin&cnturl=https:%2F%2Fdevelopers.google.com%2Fidentity%2Fsign-in%2Fandroid%2Fsign-in%3Fconfigured%3Dtrue&cntlbl=Continue%20Adding%20Sign-In然后点击下载JSON,将下载下来的json放在目录E:\research\gp\downloadApk\app下(E:\research\gp\downloadApk\app为代码su)
3.当把json放到规定目录下后报的异常:
Error:Execution failed for task ':app:processDebugGoogleServices'.
> Missing project_info object

解决办法:应该从创建该json的地方下载该文件,地址:
https://developers.google.com/mobile/add?platform=android&cntapi=signin&cnturl=https:%2F%2Fdevelopers.google.com%2Fidentity%2Fsign-in%2Fandroid%2Fsign-in%3Fconfigured%3Dtrue&cntlbl=Continue%20Adding%20Sign-In

点击choose and configure services->,然后点击ENABLE GOOGLE SIGN-IN

然后点击Generate configuration files ->

点击Continue Adding Sign-In ->

然后重新进入主页:https://developers.google.com/mobile/add?platform=android&cntapi=signin&cnturl=https:%2F%2Fdevelopers.google.com%2Fidentity%2Fsign-in%2Fandroid%2Fsign-in%3Fconfigured%3Dtrue&cntlbl=Continue%20Adding%20Sign-In

点击Choose and configure services ->

点击Generate configuration files->

点击Download gogle-services.json
4.方法handleSignInResult(GoogleSignInResult result)中result.isSuccess()返回false,一般是授权没有正确配置

解决办法:
打开API控制台界面:https://console.developers.google.com/cloud-resource-manager,如果没有项目,则先创建一个项目,如果项目已经存在,则从项目中选择一个


然后点击左上角的三条横岗图标-->API管理器-->信息中心

点击启用API,并搜索Google Play Android Developer API ,点击该API,然后点击启用


点击在API Explorer中试用此API,然后开启Authorize requests using OAuth 2.0,勾选复选框,并点击Authorize


重新回退到信息API管理器界面https://console.developers.google.com/apis/api/androidpublisher.googleapis.com/overview?project=test-analytics-f14b6&duration=PT1H,并点击创建凭据,选择OAuth客户端ID


选择Android

启动cmd控制台,并输入命令获取签名文件的SHA1值keytool -list -v -keystore E:\research\gp\downloadApk\app\download.keystore,“ E:\research\gp\downloadApk\app\download.keystore”为文件所在的完整路径

拷贝SHA1的值,输入包名,并点击创建

然后重新点击创建凭据-->OAuth客户端ID-->网页应用-->创建


5.获取到的token为空
解决办法:
 gso = new GoogleSignInOptions.Builder(GoogleSignInOptions.DEFAULT_SIGN_IN)
//                .requestIdToken(getString(R.string.default_web_client_id))
                .requestIdToken(getString(R.string.default_web_client_id))
                .requestEmail()
                .build();
创建GoogleSignInOptions对象时,加上requestIdToken方法
.requestIdToken(getString(R.string.default_web_client_id))


 1828
1828


 暂无认证
暂无认证


 到【灌水乐园】发言


尘垢475: ?这都能水一篇文章? 还有人收藏?
azhenzhendebuhui: 老哥我这波 <title>Welcome to nginx!</title> If you see this page, the nginx web server is successfully installed and working. Further configuration is required nginx: the configuration file /usr/local/nginx/conf/nginx.conf syntax is ok nginx: configuration file /usr/local/nginx/conf/nginx.conf test is successful 但是 tcp6 0 0 :::12225 :::* LISTEN 914/sshd 这里没有分给nginx怎么搞呢
lupe_c: 之前部署京东云一下就成功了 原来阿里云是这个原因 感谢!
2301_76837285: 完美的答案
北风toto: 换个浏览器,我的就是很无语,谷歌浏览器无法访问,但是360浏览器就可以访问